
This guide explains how to correctly integrate an Araknis router with Starlink. The goal is for Araknis to be the main router of the network, while Starlink acts solely as an internet provider.
Includes steps for:
- Initial physical connection
- Activate Bypass mode on Starlink
- Configure static routes on Araknis
- Advanced options (Dual-WAN / Failover)
- Restore the Starlink router if necessary
💡 Reference sources:
Starlink setup for Araknis routers – Staub
How to Bypass the Starlink Router – DishyTech
1. Initial Starlink connections
- Connect the Starlink dish to its power supply.
- The power supply must be plugged into a grounded outlet.
- Connect the cables according to their colors: black to black, white to white.
- When correctly connected, the lights on the power supply will turn solid white.
- The dish will automatically level itself and orient itself toward the satellites.
⚠️ Important: Do not attempt to adjust the Starlink dish manually.
2. Connect Starlink to your Araknis router
Depending on the version of Starlink:
- Gen 3 (Standard): Remove the rubber cover and connect an Ethernet cable from one of the LAN ports to the WAN1 port on the Araknis.
- Gen 2 (Actuated): You need an official Starlink Ethernet adapter.
- Mini: The Ethernet port is on the back of the antenna.
- Enterprise & High Performance: include a special cable that connects from the source to the third-party router.
In all cases, the final connection must be Starlink (LAN) → Araknis (WAN1).
3. Activate “Bypass Mode” in Starlink
For the Araknis router to manage the network:
- First, connect to Starlink WiFi.
- Open the Starlink App (iOS/Android).
- Enter Settings → Bypass Mode and activate it.
- Submit for Review the action.
This will turn off the WiFi and routing functions of the Starlink router, keeping only the power to the dish on.
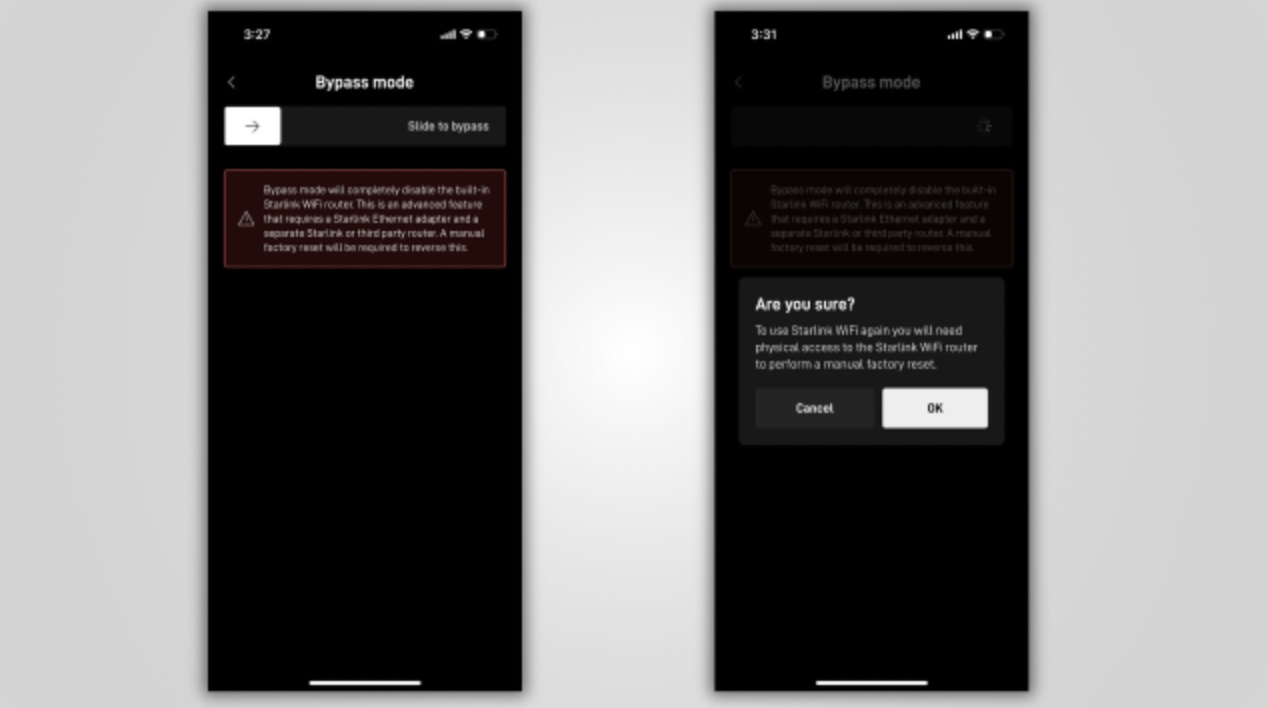
If you do not enable bypass, you will have double NAT (two routers managing the network), which can cause connectivity issues.
4. Configuring static routes in Araknis
To make the Starlink app work in bypass mode:
- Access the administration portal of your Araknis router (web or OvrC).
- Go to Advanced → Static Route.
- Configure a static route:
- Destination: 192.168.100.1
- Subnet Mask: 255.255.255.255
- Gateway: The WAN IP assigned by Starlink (may change, check in OvrC).
- Interface: WAN1.

If Starlink changes the WAN IP, you will need to update this route manually.
5. Configure Dual-WAN and Failover (optional)
On Araknis routers such as the AN310, you can use dual WAN:
- Update the firmware to version 1.1.64 or higher.
- Go to Multi-WAN.
- Activate Network Service Detection.
- Configure:
- Action = Log and Failover
- Ping Default Gateway = activated
- Ping Remote IPs = 8.8.8.8 y 4.2.2.2
This way, if Starlink fails, Araknis will automatically switch to the second WAN connection.
6. Restore the Starlink router
If you want to go back to using your Starlink router in normal mode:
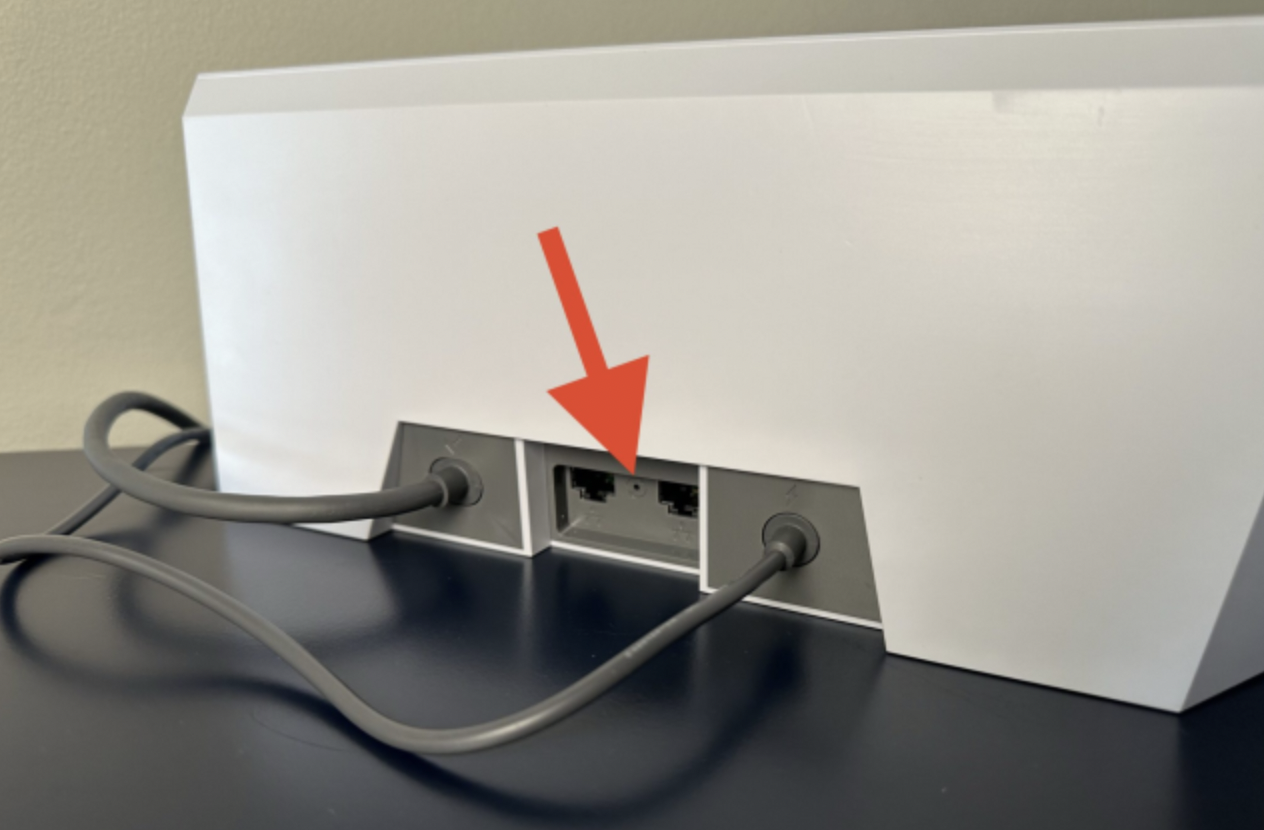
- Gen 3: Press and hold the reset button on the back (between the Ethernet ports).
- Gen 2: turn off and turn on the power 6 times in a row.
After a few minutes, you will see a WiFi network called “STARLINK.”
Connect and use the app to set up a new SSID and password.
7. Final recommendations
- Always connect WAN1 on the Araknis → Ethernet port on the Starlink.
- Use Bypass Mode for a stable network.
- Configure the static route in Araknis for the Starlink app to work.
- Keep your Araknis firmware up to date.
- For issues with the Starlink dish (orientation, firmware, obstructions), use the Starlink App.
With this configuration, Starlink will be your internet provider and Araknis will manage the entire network, with full support for the Starlink app and failover capability.