Before installing...
Get the project plans and mark the wall materials. Examples of materials:
- Bookshelf
- Bamboo
- Wood
- Drywall (or Gypsum Board)
- Office shelf
- Vinyl Siding
- Brick
- Concrete Blocks
- Plaster and Lath (Wood)
- Retail shelf
- Earth (or Mud)
- Fiber Cement Panels
- Granite
- Concrete
- Glass
- Stone
- Stucco
- Thermoblock
- Tiles
- Plywood, rough
- Plaster and Lath (Metal)
- Warehouse shelf
- Iron
- Aluminium
- Copper, highly polished
Mark the zones that will be more crowded. The maximum number of devices that will be connected at the same time is ____________________.
💡 Remember that 30-40 devices are the maximum number of devices connected to one AP at a time to provide a smooth experience.
Plan the AP placement considering the wall materials and max devices connected. Do not plan to hide APs in closets or above false ceilings.
Plan the non-overlapping channels for each AP:
- 2,4GHz
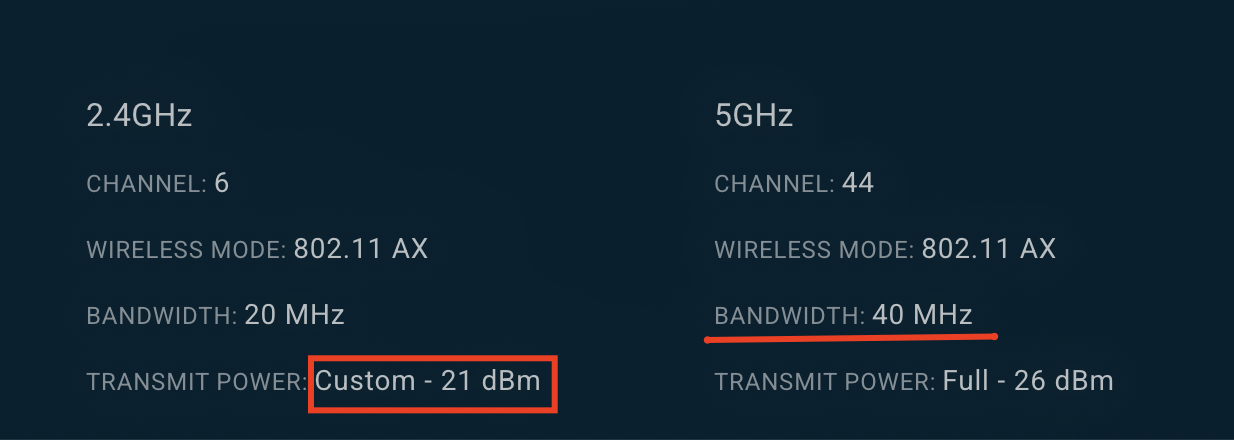
- 20MHz wide: Channels 1, 6, 11 (no other option)
- 5GHz
- 40MHz wide: Channels 36, 44, 149, 157 (preferred option)
- 80MHz wide: Channels 36, 149 (if there are only 2 or 3 APs)
Installation
⚠️ Never cover/hide the AP. Use the in-ceiling mounting brackets.
💡 Note: The minimum depth for the bracket to fit in the ceiling is 101,6mm (4”).
Use the provided cutout template to cut a hole in the ceiling. The AN-ACC-ICBKT-SR for APs with a 201mm (7.69") diameter or the AN-ACC-ICBKT-LR for APs with a diameter of 251mm (9.52")
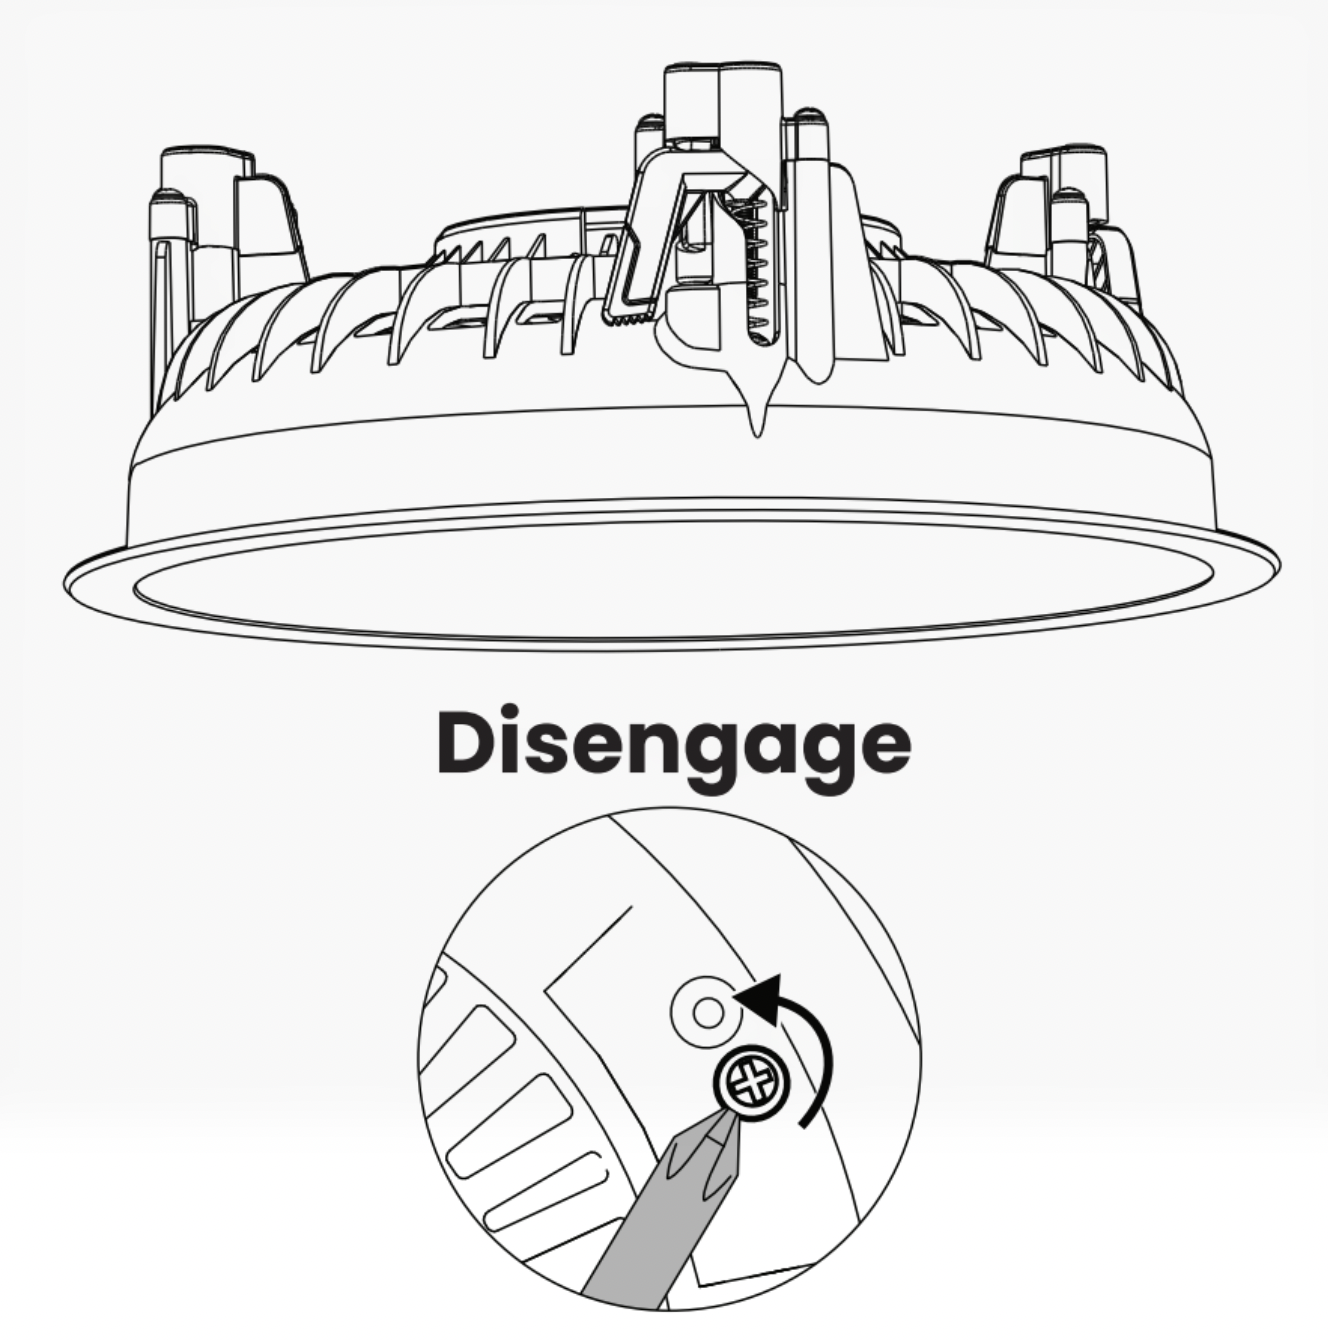
Disengage the dog ears on the bracket. Use a #2 Phillips head screwdriver to push the dog ear back and turn it counter-clockwise.
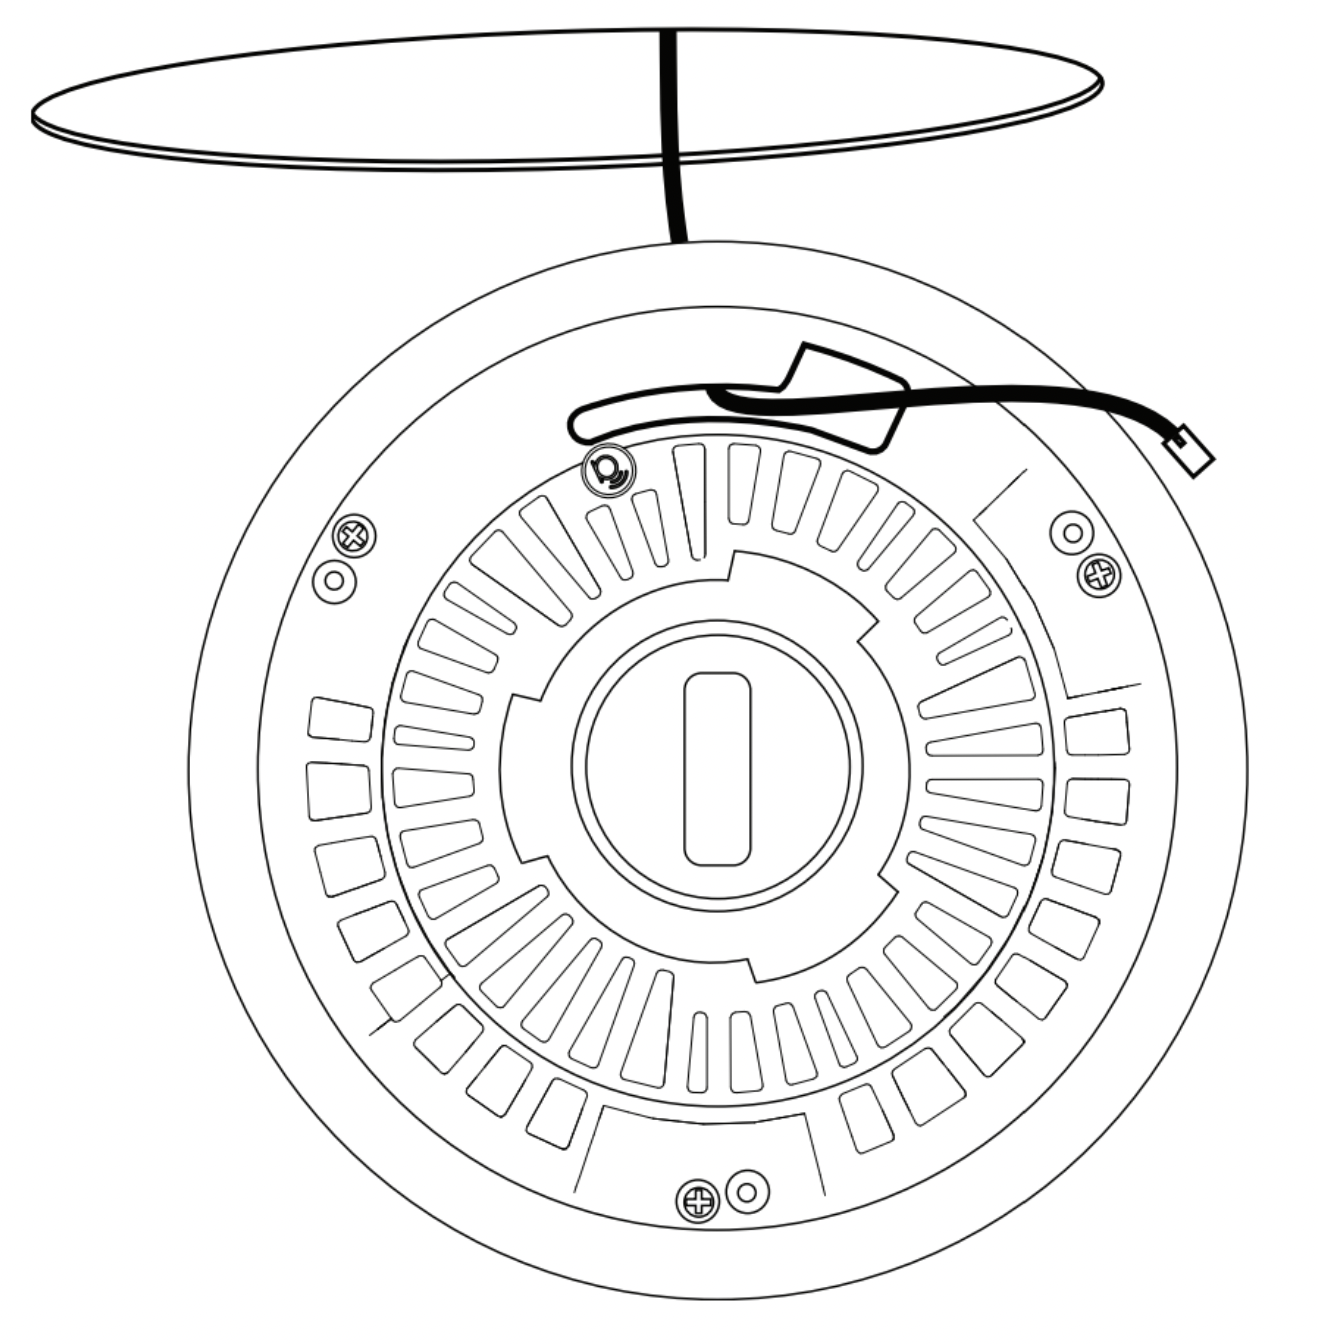
Pull the category cable through the mount’s cable management hole. If the mount must be tied off, use the safety strap bar at the top of the mount.
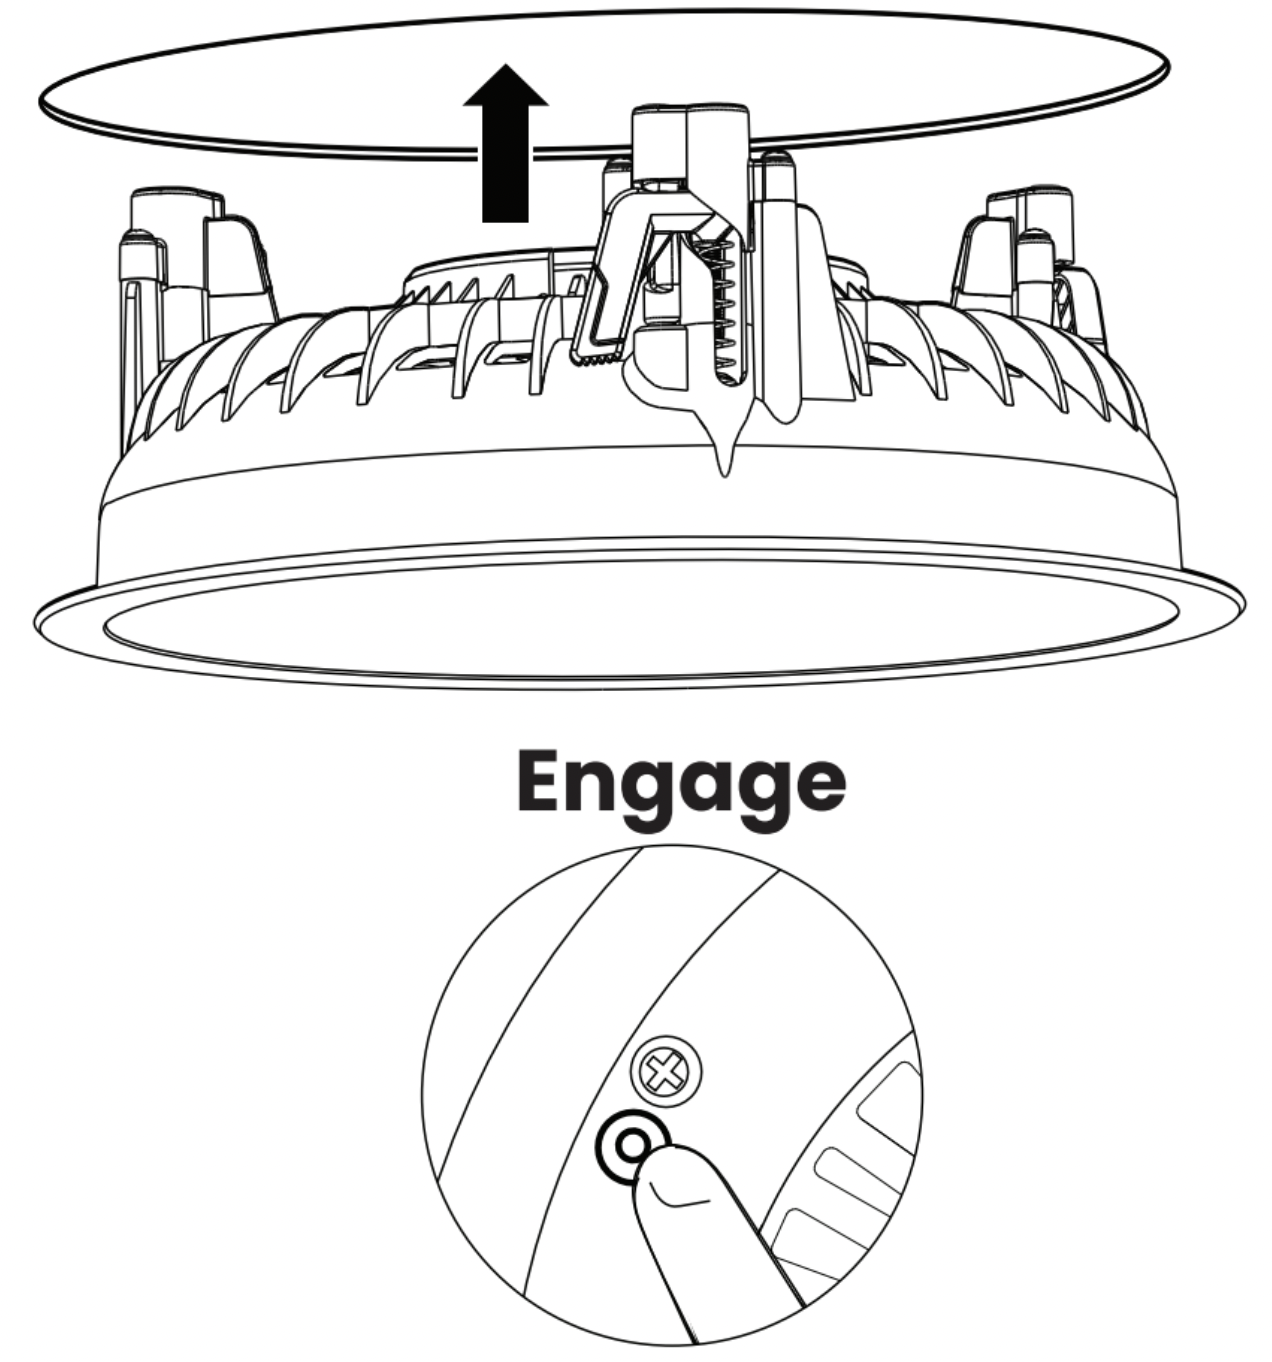
Place the mount in the hole and press the three buttons to engage the dog ears.
Slide the adapter onto the AP. It clicks twice.
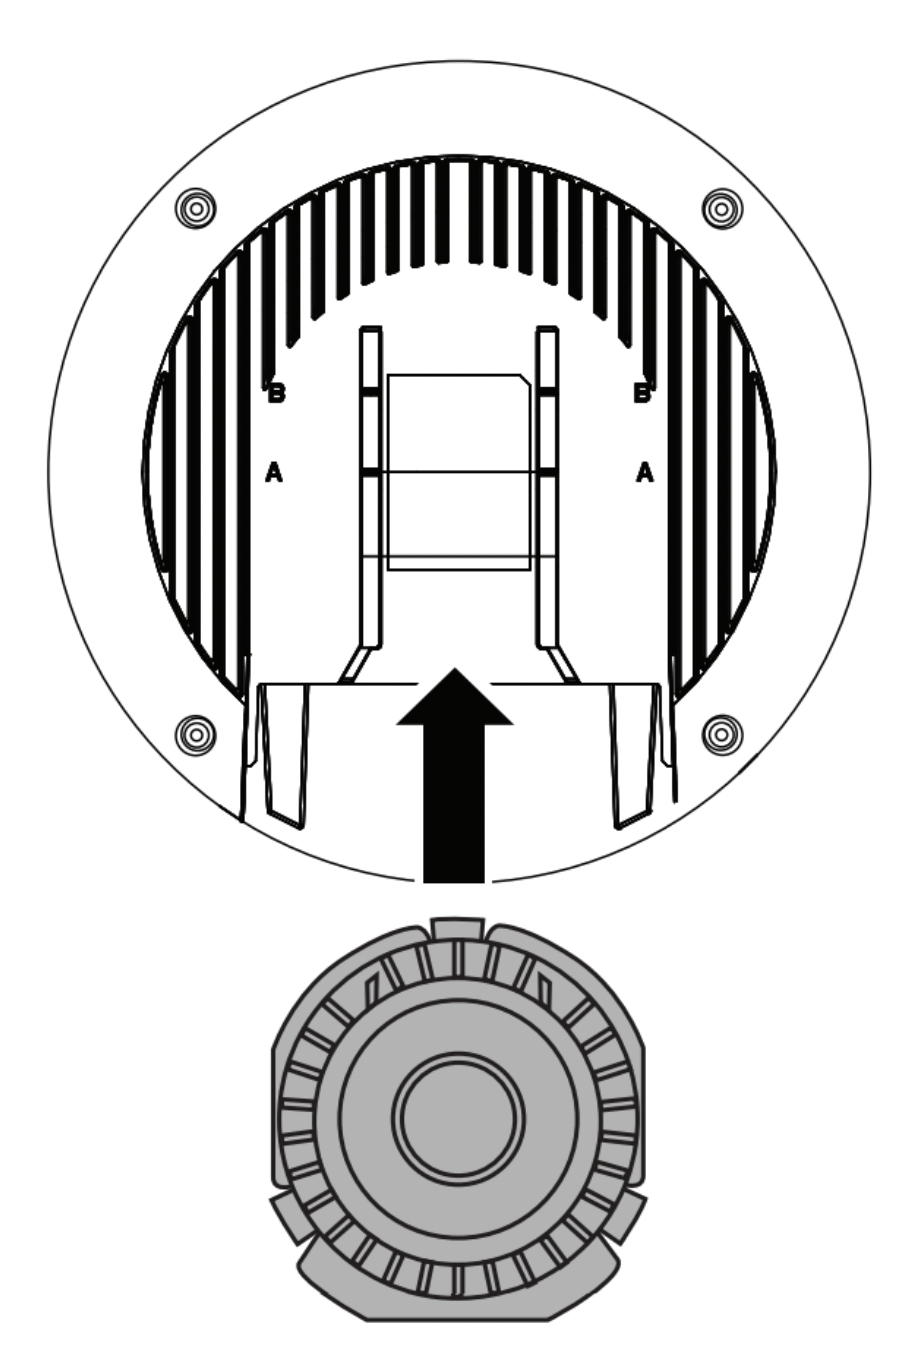
Connect the category cable to the AP, then align the Araknis logo under the mount’s cable management hole and the logo on the AP to help you guide the AP into place.
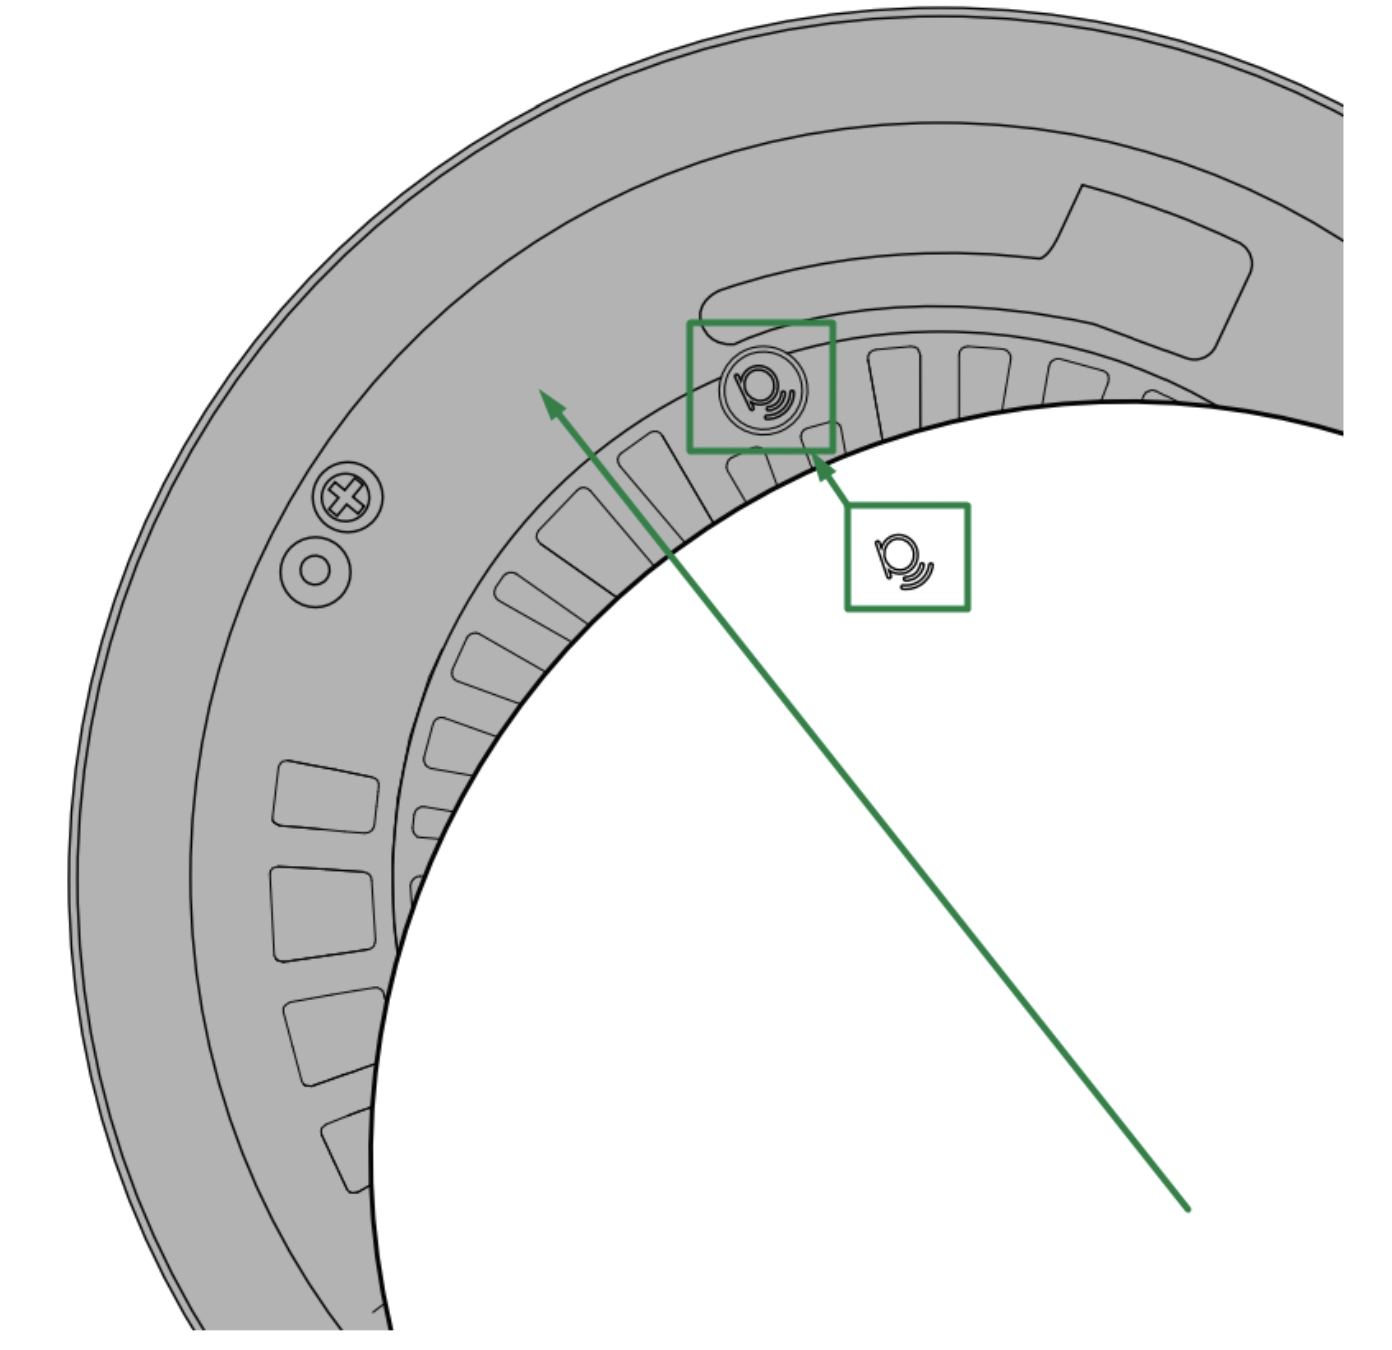
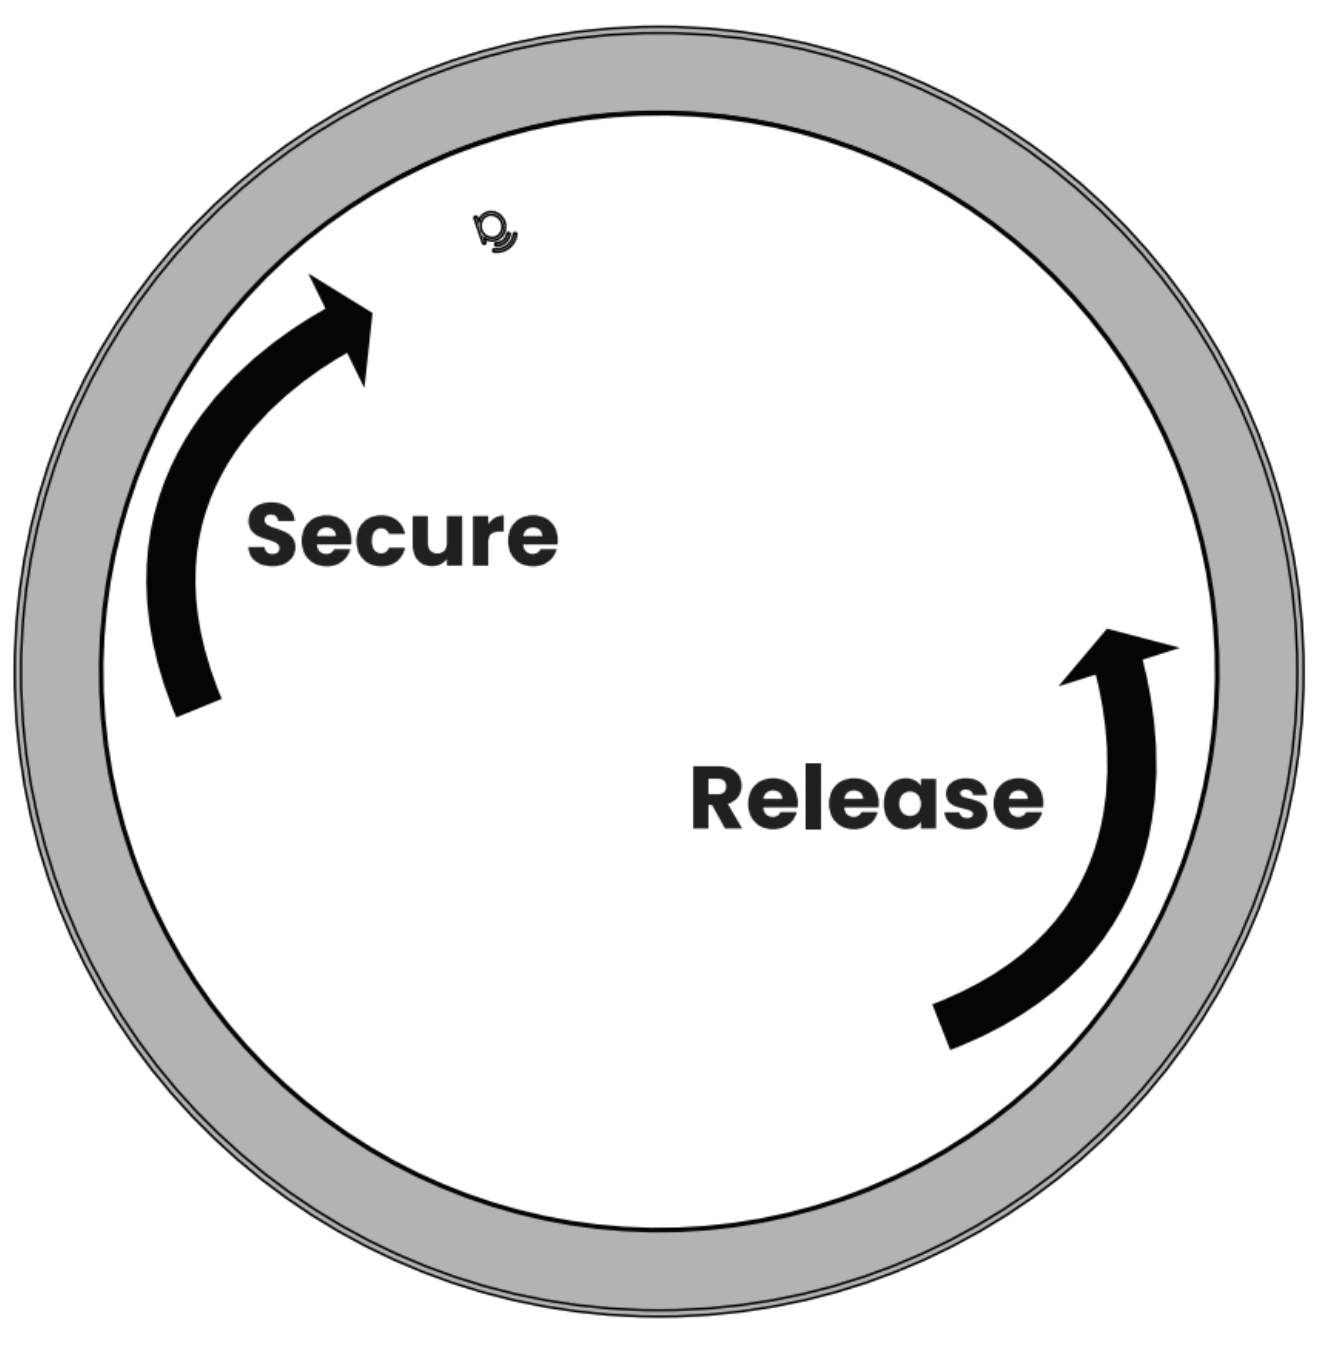
Gently push the AP and turn it clockwise to lock it into place. To release the AP, gently push and turn it counter-clockwise.
DHCP Reservation
Once all APs have been connected to the network, the router will provide an IP by DHCP. To change that IP address, we will need to perform a DHCP reservation.
Log in to the router > Status > Clients and services > Client Table > look for the APs and click this button
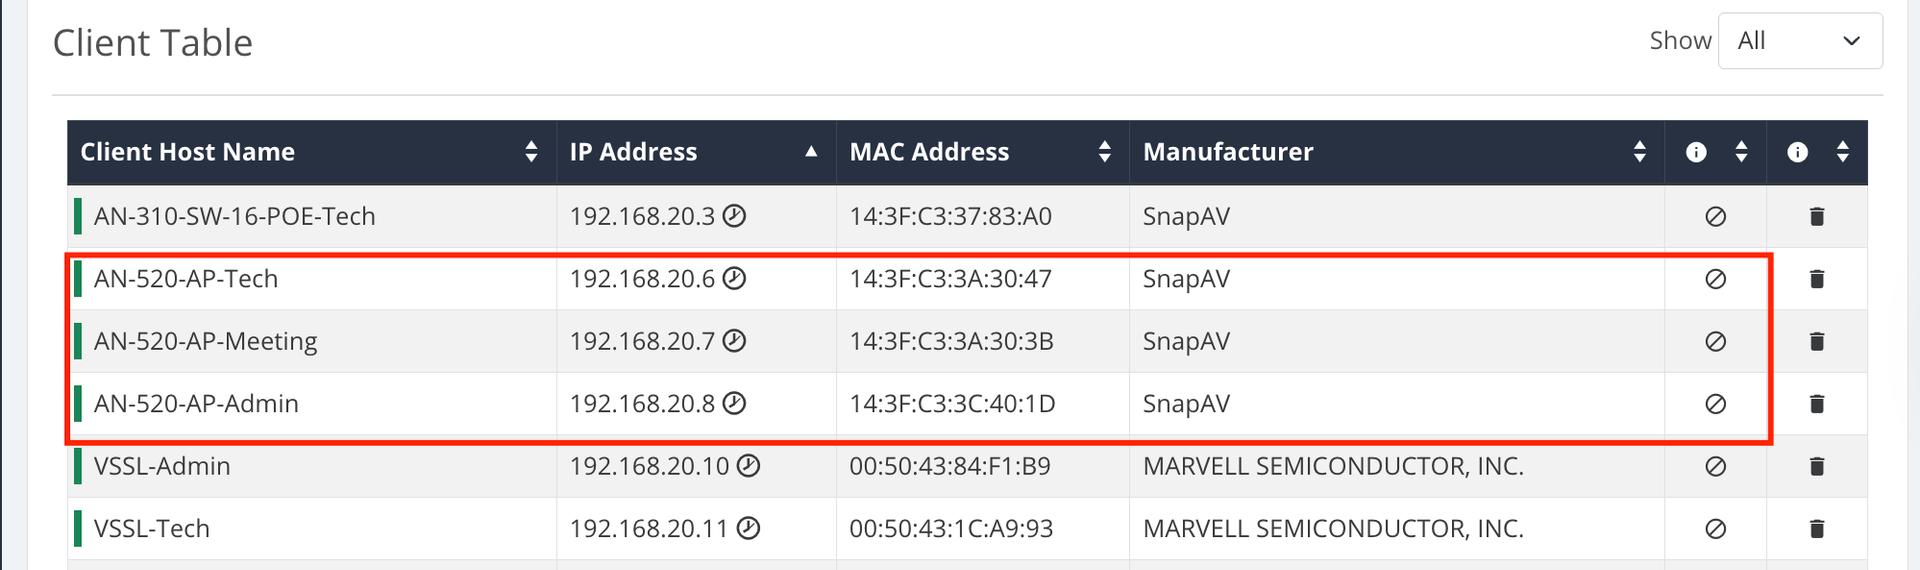
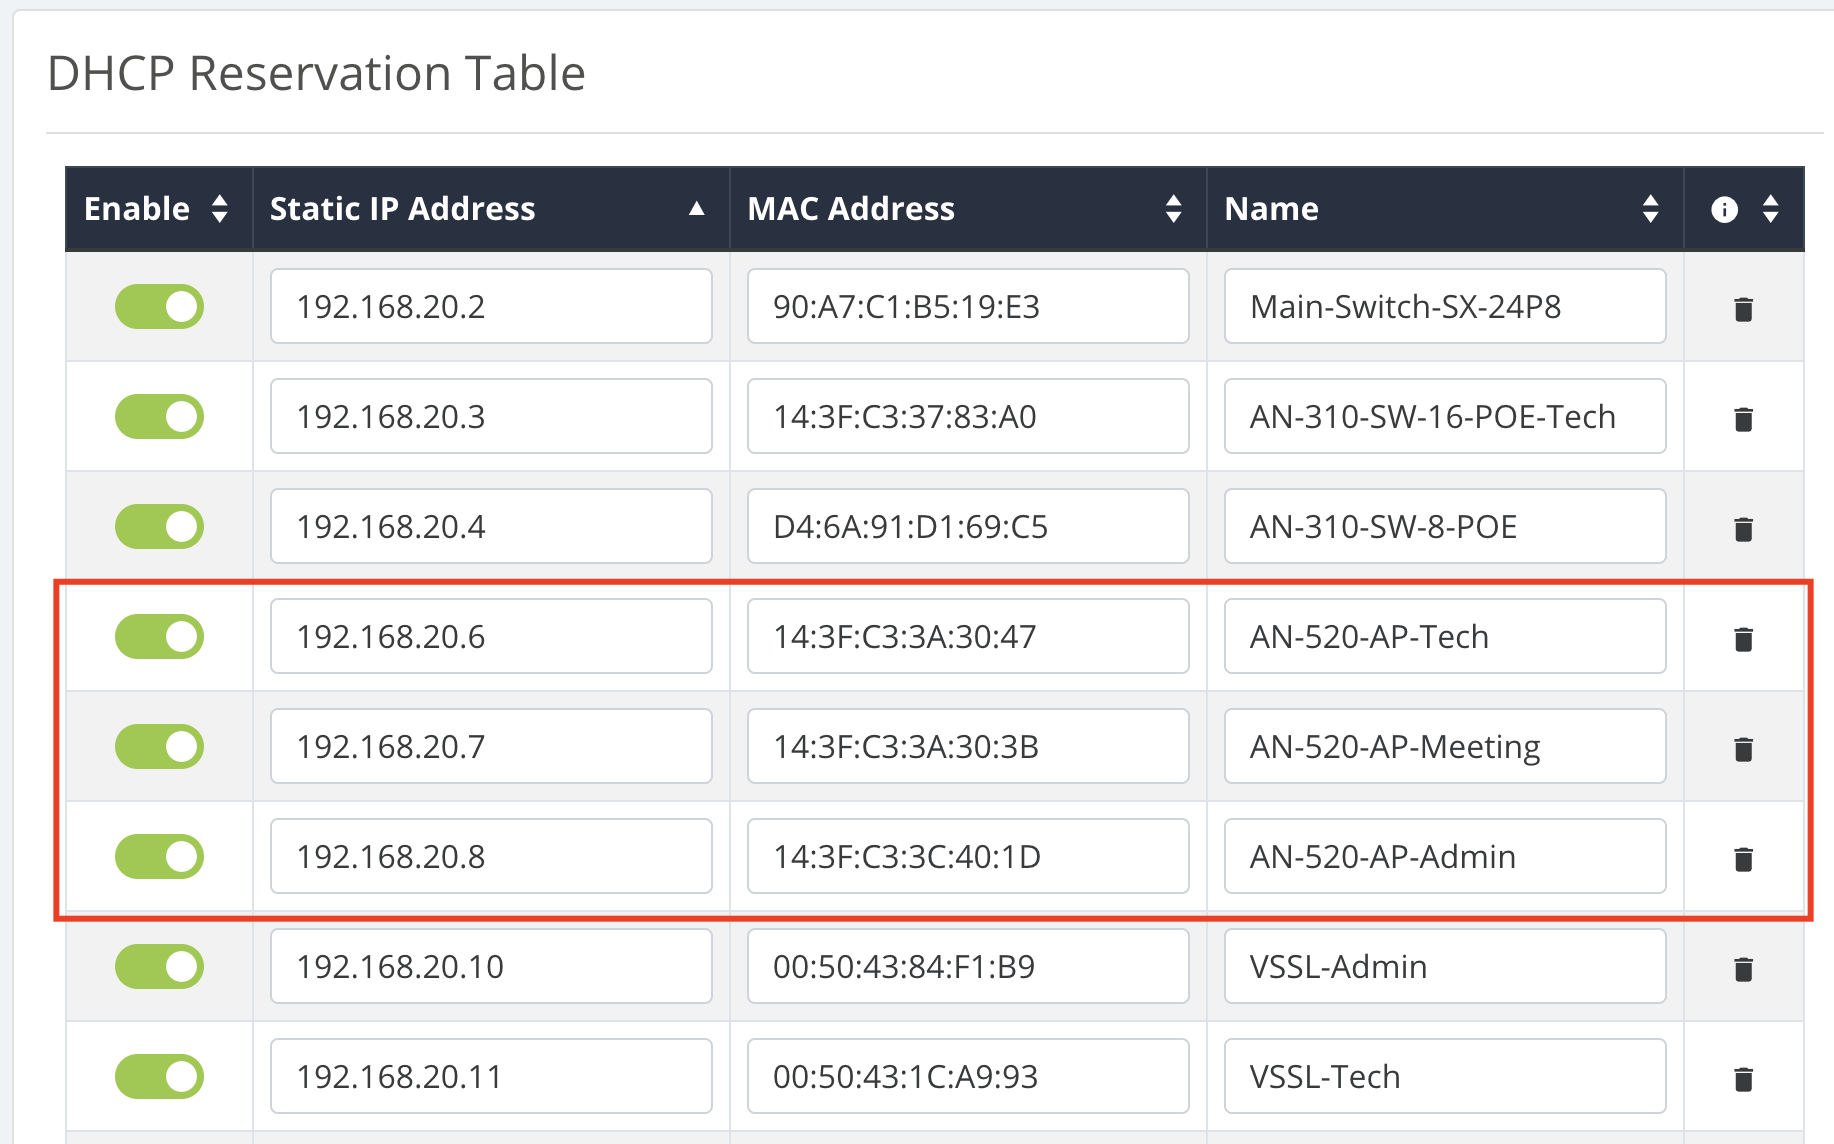
Go to Settings > LAN > DHCP Reservation Table and change the AP's IP.
⚠️ Reboot all access points to make them adopt their new IP addresses.
Measure the RSSI
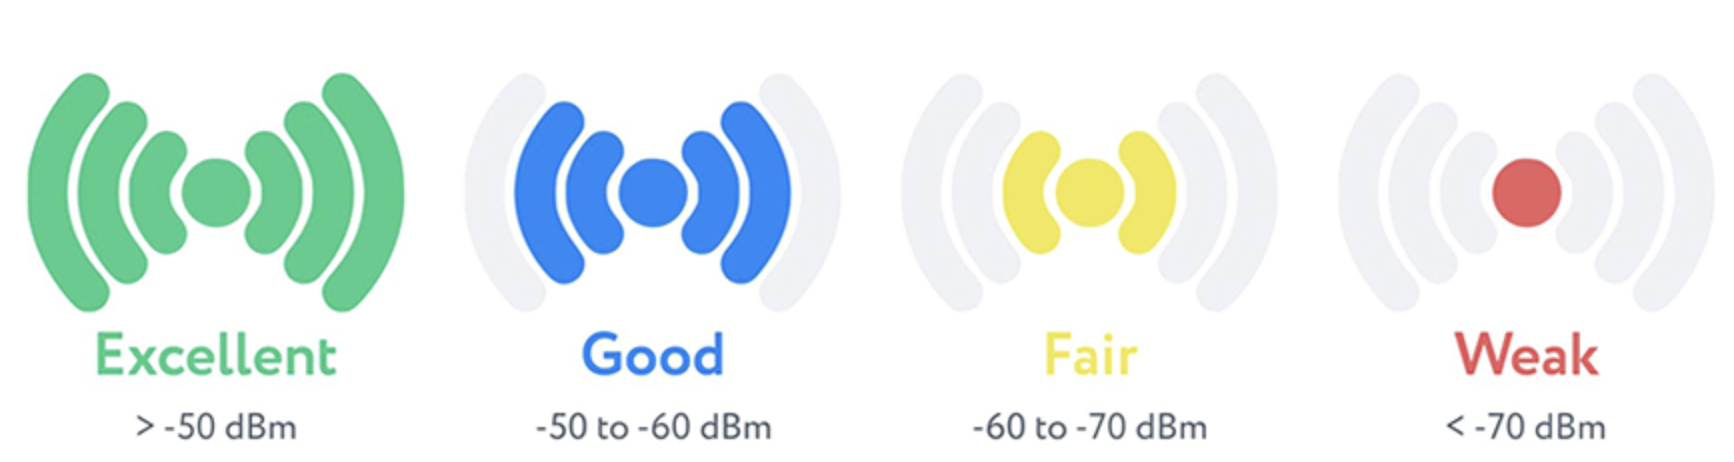
Minimum of -65dBm for 5GHz and -70dBm for 2,4GHz
Materials and the amount of signal loss
Material | Amount of Signal Loss |
Glass window | 2 dBm |
Wood | 3 dBm |
Cubicles | 3-5 dBm |
Plasterboard | 3 dBm |
Drywall | 4 dBm |
Cinderblock | 5 dBm |
Marble | 5 dBm |
Glass wall with a metal frame | 6 dBm |
Brick | 8 dBm |
Concrete | 10-15 dBm |
Create 2 SSIDs
5 GHz all-use
2.4 GHz for remotes, WiFi thermostats, garage doors, IoT devices, etc
💡 Reduce the 2.4 GHz band transmit power by 5 dBm compared with 5GHz. Example: If the 5GHz band has full transmit power at 26dBm, then the 2.4GHz needs to be 5dBm less; that means a custom value of 21dBm.